Building and Configuring OpenLDAP on macOS
While working on an LDAP integration, I needed a local directory server for development and testing. The OpenLDAP installation used at the time required several build and configuration steps on macOS, so this article documents the complete process.
Version context: This walkthrough was created with OpenLDAP 2.4.45, the Homebrew ecosystem available in 2017, Berkeley DB, and
slapd.conf-based configuration. Current OpenLDAP and macOS installations may use different packages, backends, configuration formats, paths, and security defaults. Treat the commands below as a historical build record and verify current OpenLDAP documentation before using them on a modern system.
Prerequisites Used in the Original Setup
The environment used:
- macOS
- Homebrew
- OpenLDAP source distribution
- Berkeley DB
- JXplorer as an LDAP browser
Install Berkeley DB
The first step was installing the database dependency with Homebrew:
brew install berkeley-db4
The installation produced compiler and linker details used when configuring OpenLDAP:
If you need to have this software first in your PATH run:
  echo 'export PATH="/usr/local/opt/berkeley-db@4/bin:$PATH"' >> ~/.bash_profile


For compilers to find this software you may need to set:
    LDFLAGS:  -L/usr/local/opt/berkeley-db@4/lib
    CPPFLAGS: -I/usr/local/opt/berkeley-db@4/include
Configure the OpenLDAP Build
After extracting the OpenLDAP source archive, the build was configured with the Berkeley DB paths:
./configure CPPFLAGS="-I/usr/local/opt/berkeley-db@4/include" LDFLAGS="-L/usr/local/opt/berkeley-db@4/lib"
The LDFLAGS and CPPFLAGS values came from the Berkeley DB installation output.
Build Dependencies and Compile
Generate dependencies:
make depend
Build OpenLDAP:
make
Run the Test Suite
Running the tests was optional but recommended before installation:
make test
Install OpenLDAP
After a successful build and test run:
make install
In this installation, the data directory was /usr/local/var/openldap-data and configuration files were under /usr/local/etc/openldap.
Configure slapd
The original slapd.conf configuration steps are preserved here:
Step 1. Go to following folder.


cd /usr/local/etc/openldap


Step 2. Open slapd.conf file.


vi slapd.conf


Step 3. You will see this line:


include         /usr/local/etc/openldap/schema/core.schema


Step 4. Add following lines:


include         /usr/local/etc/openldap/schema/cosine.schema
include         /usr/local/etc/openldap/schema/nis.schema
include         /usr/local/etc/openldap/schema/inetorgperson.schema


Step 5. Update suffix to desired value:


suffix          "dc=my-domain,dc=com"


Step 6. Update rootdn, it should match with above suffix value:


rootdn          "cn=Manager,dc=my-domain,dc=com"


Step 7. Update rootpw:


rootpw          secret
Avoid storing the directory root password in plaintext. The original workflow used the OpenLDAP password utility to generate a hash:
To generate password hash:


./slappasswd -s <NewPassword>
Start the Directory Server
sudo /usr/local/libexec/slapd -d3
Create the Initial Directory Structure
Create the initial LDIF content:
dn:dc=my-domain,dc=com
objectClass:dcObject
objectClass:organizationalUnit
dc:my-domain
ou:my-domain
Then add it to the directory:
ldapadd -D "cn=Manager,dc=my-domain,dc=com" -W -x -f /<Location>/root-ou.ldif
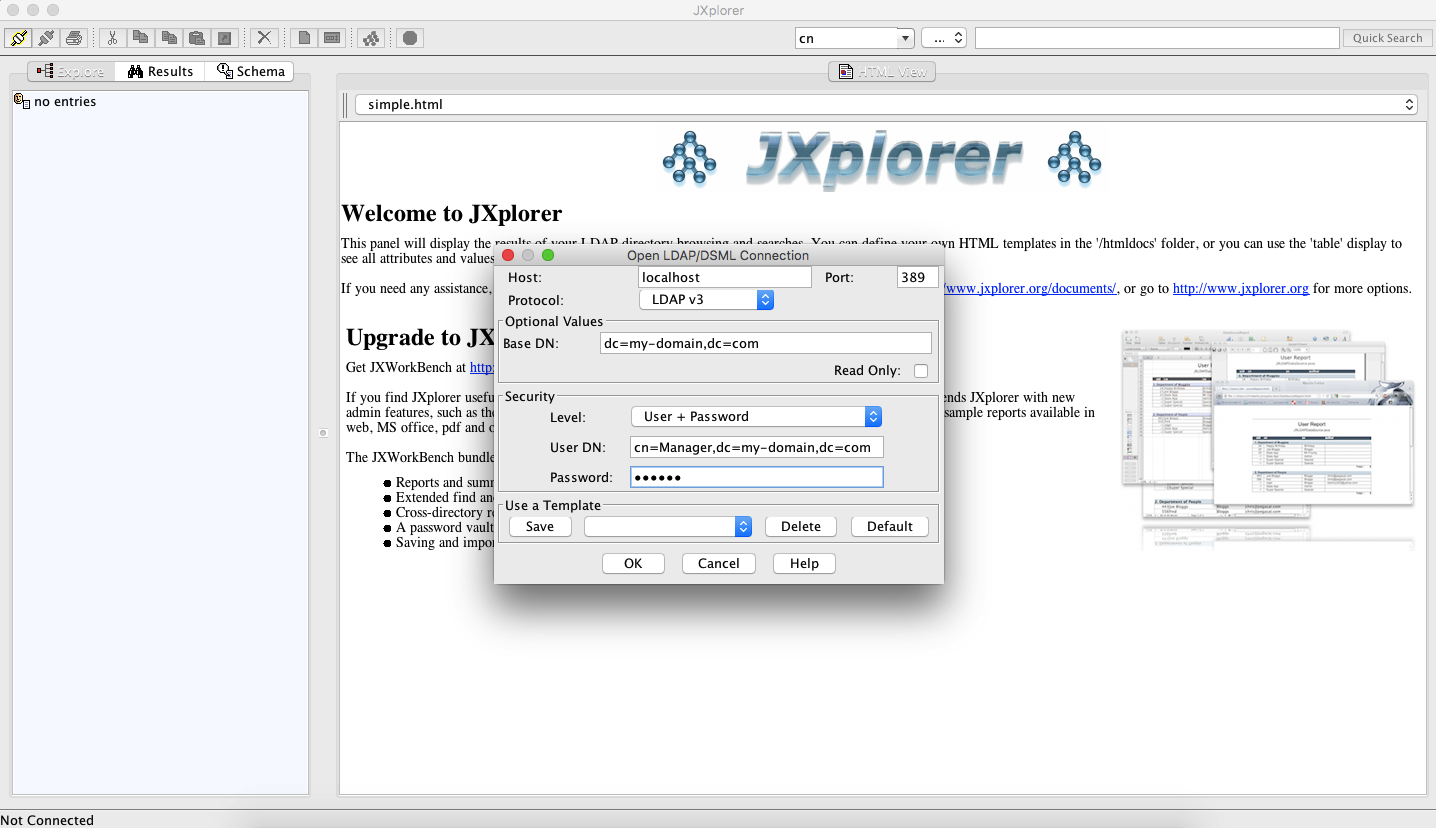
Once the server is running and the base entries are loaded, an LDAP browser such as JXplorer can be used to inspect and manage the directory tree.
Takeaway
This setup illustrates the components behind a directory-server installation: native dependencies, compilation, validation, server configuration, credential handling, process startup, and directory initialization. Those concepts remain useful even though modern OpenLDAP installation and configuration practices have evolved considerably.